1、新建wifi.ps1文件并编辑
2、复制并粘贴下方代码之后保存
Add-Type -AssemblyName System.Runtime.WindowsRuntime
$asTaskGeneric = ([System.WindowsRuntimeSystemExtensions].GetMethods() | ? { $_.Name -eq 'AsTask' -and $_.GetParameters().Count -eq 1 -and $_.GetParameters()[0].ParameterType.Name -eq 'IAsyncOperation`1' })[0]
Function Await($WinRtTask, $ResultType) {
    $asTask = $asTaskGeneric.MakeGenericMethod($ResultType)
    $netTask = $asTask.Invoke($null, @($WinRtTask))
    $netTask.Wait(-1) | Out-Null
    $netTask.Result
}
Function AwaitAction($WinRtAction) {
    $asTask = ([System.WindowsRuntimeSystemExtensions].GetMethods() | ? { $_.Name -eq 'AsTask' -and $_.GetParameters().Count -eq 1 -and !$_.IsGenericMethod })[0]
    $netTask = $asTask.Invoke($null, @($WinRtAction))
    $netTask.Wait(-1) | Out-Null
}

$connectionProfile = [Windows.Networking.Connectivity.NetworkInformation,Windows.Networking.Connectivity,ContentType=WindowsRuntime]::GetInternetConnectionProfile()
$tetheringManager = [Windows.Networking.NetworkOperators.NetworkOperatorTetheringManager,Windows.Networking.NetworkOperators,ContentType=WindowsRuntime]::CreateFromConnectionProfile($connectionProfile)
if ($tetheringManager.TetheringOperationalState -eq 1)
{
    "Hotspot is already On!"
}
else{
    "Hotspot is off! Turning it on"
    Await ($tetheringManager.StartTetheringAsync()) ([Windows.Networking.NetworkOperators.NetworkOperatorTetheringOperationResult])
}
3、由于win10默认禁止直接运行ps1脚本,所以需要修改下系统策略
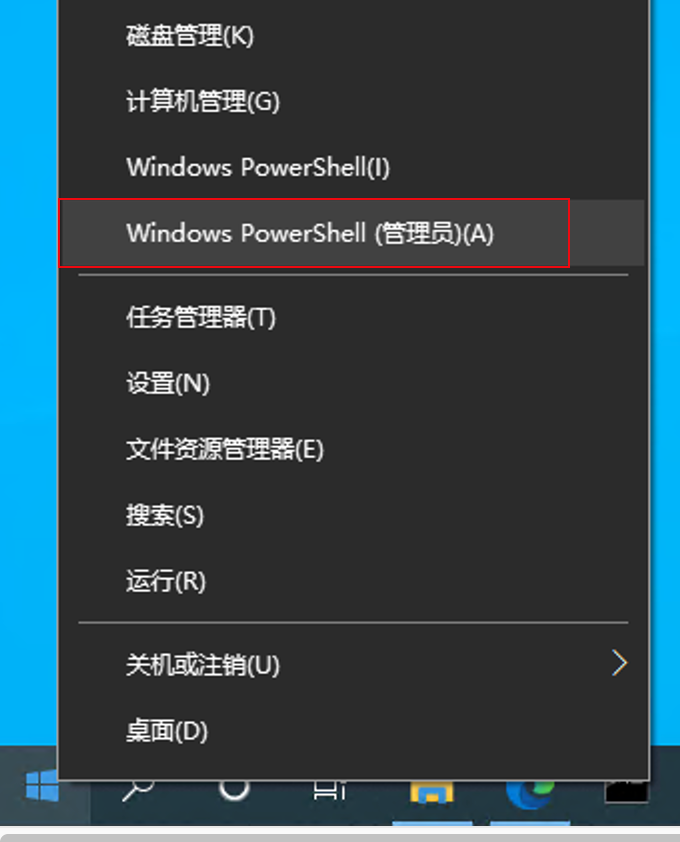
右键点击开始按钮>Windows PowerShell(管理员)。
执行下方命令
set-executionpolicy remotesigned
输入A回车
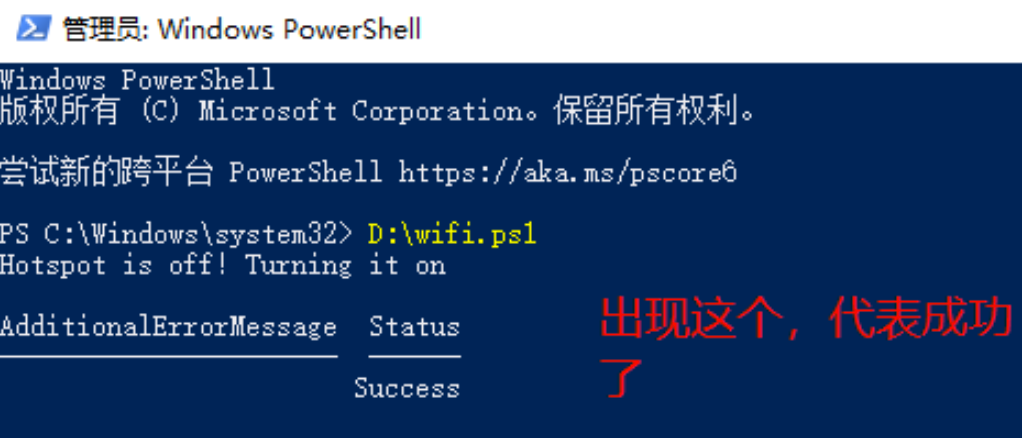
测试:可以在PowerShell中运行一下wifi.ps1脚本看下是否正常(测试前记得手动在windows界面上把热点关掉再试)
4、在相同目录下新建wifi.bat文件并编辑
5、复制并粘贴下方代码之后保存
choice  /t 5 /d y /n >nul
pushd %~dp0
powershell.exe -command ^
  "& {set-executionpolicy Remotesigned -Scope Process; .'.\wifi.ps1' }"
popd
解释:第一行代码表示延迟5秒钟执行,这里可以修改自定义的时间(可以实现在开机后延迟多少秒启动wifi热点,避免运行太早此时电脑还没连上网络导致失败)
其余代码为调用powershell来运行上述编写好的wifi.ps1文件
6、创建wifi.bat文件的快捷方式,并放入下方文件夹实现开机自启
%ProgramData%\Microsoft\Windows\Start Menu\Programs\Startup
7、完成
参考资料:
https://blog.csdn.net/qq_25667815/article/details/119215248
win10设置开机自启路径


